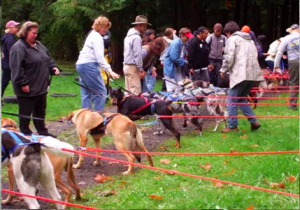
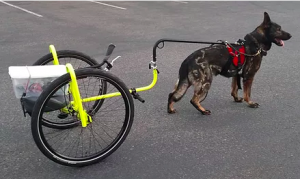
Proper fitting of harness; Dorsal Hitch:
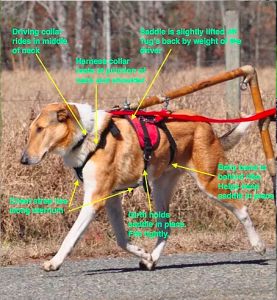
Where does the dorsal hitch saddle sit?
How tight is the girth and belly band?
Is the chest strap long enough?
Where does the collar sit?
How much lift is needed on the saddle for the dorsal hitch?
Proper fitting of harness; Side shaft hitch:
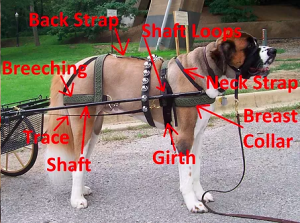
Where should the shafts be on the dog?
How long should the shafts be?
Dog pulls with traces; not with shafts
(for most not all designs)
(link to other sites that specialize in side shafts)
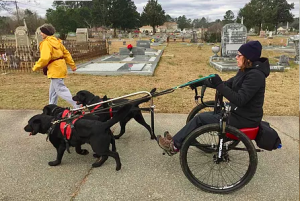
Sulky types
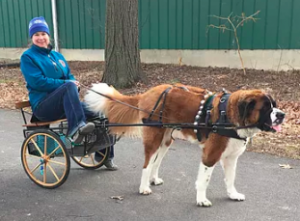
The important thing to remember is the seat should be behind the axle to create lift. Lift does not put any weight onto the dogs back. Pony and goat sulkies are unacceptable, they are to heavy and to big for your dog, there is no lift and the weight of the sulky would be resting on the dogs back.
Dogs are not built like goats and horses. as in their spine is sensitive and cannot withstand weight for periods of time.
Teach line out
Dog to walk to end of line, face front, hold that position until released. Tie to fence and lure to end of line with rewards, treats, toys or sniffing. Physically place dog with leash while tied to a fence, if needed. Success is when the dog holds the line out tight while you walk around and stand behind him.
Ground training – On leash
Put the sulky harness on the dog and practice dog driving commands (Leash to collar, not harness). When you are about to make a turn, say “Right!” and turn dramatically right, or use the word “Gee”. Practice left and right, walk, trot and hike/hike. Stop often to practice “Wait!” (or “Whoa”).
Teach the dog to walk in front of you when given the command “Up Front” or “Line Out”. Alternate between “Heel” (beside me) and “Up front” (in front of me). Switch to a longer leash so the dog becomes accustomed to obeying commands given from behind him/her.
When a distraction such as an approaching dog on a leash appears, practice going “On-by” the distraction. With a friend you can alternate “Go say Hi” with go “On-by”.
Do not let the dog sniff or play around on his/her own. When you give the command, make the dog obey it. Take the harness off as soon as the practice is over. The harness tells the dog that it is time to work.
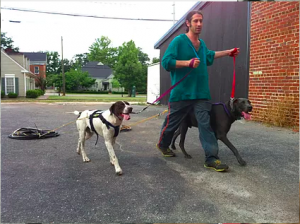
Ground training – with drag
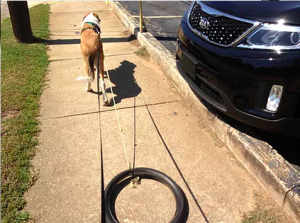
Snap the drag to the dog’s sulky harness, not to his/her collar. Discarded bicycle tires are ideal. Use a drag that is easy to pull and will not roll into the dog and frighten him/her. The novice dog will usually be alarmed by something dragging behind.
Leash walk the dog with the drag, on nice quiet grass until his alarm is gone. Practice your commands while he pulls the tire; walk, trot, wait. Get the dogs mind off of it’s fear. Once calm, walk to a different surface such as pavement. Save noisy gravel until last.
Practice the commands while walking behind the dog at first, the goal is to practice all commands while you walk behind the tire. Once your dog walks well following your commands while you walk behind the drag, clip a set of reins to his driving collar. Teach him to receive commands (left/right, easy/whoa) from the reins.
For side shaft vehicles
(An extra step)
Attach poles to side of harness and drag. Practice the directional commands you have been learning.
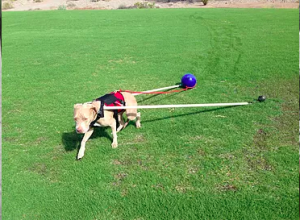
Ground training – with sulky.
Walk the dog on a leash while you pull the sulky, most likely he/she will not take much notice. Before you hitch the sulky to the dog, slide the seat back and fasten a weight to the seat so there is upward lift on the harness. The first time you hitch your dog to the sulky, have a helper with you.
You have a leash to the collar on one side and your helper has a leash to the collar on the other side. Hitch the leashed dog to the shaft tip (Do not clip on the safety straps, do not clip on the tug-line). Dogs startle at the strange sulky following them. Give the command “Walk” which he knows from ground training. You and your helper help guide him/her forward.
Alternate “Walk” and “Whoa”. Soon your dog will accept the sulky. Should your dog panic and twirl around to view the scary sulky, you and your helper will need to physically control him/her and walk until the dog stops turning and freaking (If you have done days or weeks of ground training, the dog probably wont freak out).
Advanced ground training with sulky.

Still no rider, handler walks behind sulky. Team practices directional commands; stop/go, left/right, fast/slow, stay to right/left of trail (depending on what country you are in), ignore other dogs, wait quietly while owner is not close by.
Before you can ride the sulky, you must train your dog to pull weight. Gradually, over several days or weeks, increase the weight on the sulky seat as you ground drive the dog. Add more weight each time you take the dog out for training, until the dog is comfortable pulling the equivalent of your weight.
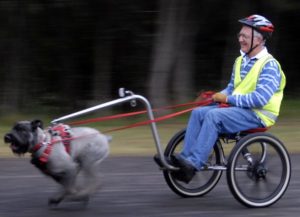
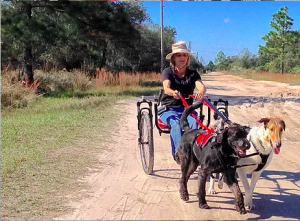
Time to ride!
You’ve now completed the ground work and your dog should be solid in obeying your commands. It is time to ride the sulky. Go to a quiet location, you may choose a location where the dog knows the route. Graveyards are usually a good start as generally the trails are paved, mostly flat with some mild change of grade. You can practice left and right turns on the grid of paved roads. Have a helper go with you at first, sit in the seat and have the helper walk next to the dog, slowly dropping back. Change drivers, sometimes the helper riders and you guide the dog. Sometimes you ride and the helper guides the dog.
Often the dog really gets the idea and the only way a helper can keep up with you is on a bicycle (unless he/she is a jogger). Remember to use your brakes to enforce commands. When you say “Easy” or “Walk” or “Whoa” and the dog keeps trotting, use the brakes (gently) to enforce the command. You don’t want to brake to abruptly, it will cause the shaft tip to dip towards the ground. Stop after the dog has had success and before the dog is tired. It’s good to end each training session on a positive note.
Solo driving.
Once your dog is trained, teach your dog to handle weight, going down hill, up hill, turns and U-turns. Practice all the driving skills; build up confidence, enjoyment and fitness.
That’s it! You’re dog driving!
Now time for some adventures. Take your dog(s) out to exciting and demanding locations, change it up and keep it interesting. Make sure to carry water and stop in the shade when tongues get long, so the dog(s) can drink and cool down. Happy Trails!
